HOWTO: Set up a Static IP on Multiple Platforms
June 04, 2013
I am running a Linux box, Android tablet and Windows 7 laptop on the same wireless router. Surprisingly or not, the joker in this deck is the Windows 7 laptop. By 'joker' I mean that the Linux box and Android tablet are perfectly capable of obtaining a router selected IP address, each and every time, and going online without further assistance. The Windows 7 laptop, part of the time goes online, and slightly more often fails to go online with the error that there is an IP conflict, and to contact my network administrator. Well, I am my network administrator, so I will be addressing this issue today.
The reality is that your network is only as nimble as the weakest link. If it is necessary to make adjustments to accommodate the one weak link, all aspects of the network must take that into account. So, to accommodate the tendency of the Windows 7 machine to be unable to acquire a dynamic IP address, we want to change all systems to have a static IP address. That is to say, we assign an IP address to each machine rather than letting the router do it for us.
First, let's look at the Linux box. Note that the exact screens may be different as the graphical user interface (GUI) chosen by Linux users varies. This GUI is Gnome 2 in CentOS 6. Start by bringing up the current IP information.
- Right Click the Network icon. Since this is a wireless connection, it looks like a staircase.
- Select Connection Information or equivalent. In other words, at this point, look, do not touch.
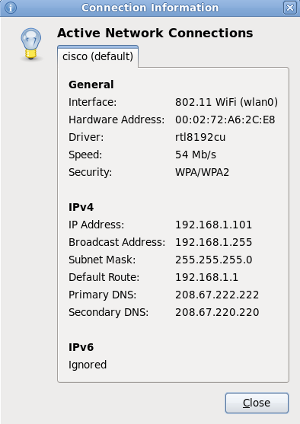
- Write down all of the information in the IPv4 section. It will be important for all of the computers we will be setting up. I mean it, write this down, you'll want it, and there WILL be a quiz on it later.
- Close this box and right click again. This time you want to Edit the Connection. The IPv4 section looks similar to this.
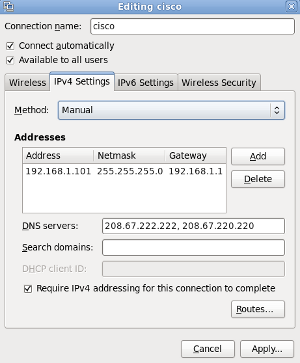
There are several things we want to pay attention to here:
The default Method here was DHCP (Dynamic Host Configuration Protocol) which means let the router decide about IP addresses. DHCP provides an IP address automatically to your various connected devices, but not all of the machines connected to the router can handle that method in our scenario. So we do the following:
- Method will be changed to Manual.
- The Address, Netmask and Gateway should be filled in with the same values that were in the automatic settings. Why? Simply because we know they worked on this machine.
We are going to take a quick but very important detour here. Note that the DNS servers have been filled in with 208.67.222.222 and 208.67.220.220. DNS stands for Domain Name Server or Domain Name Service. DNS is like a phone book, which looks up a web address, for example, www.yahoo.com and 'resolves' it into an IP address (for example 209.131.36.158) that a computer can understand. In the above example DNS Servers 208.67.222.222 and 208.67.220.220 are the phone book in which the IP address is 'looked up'. The DNS servers 208.67.222.222 and 208.67.220.220 belong to a free service called OpenDNS. It has the advantages of being supported by many third party utilities, registration is free, and as or if you decide to pursue tuning your internet connection in the future, OpenDNS provides online tools to do so.
There is also another huge advantage to using OpenDNS for domain name resolution. If you are connecting to the internet with your cable provider, your DNS requests are resolved by their DNS server by default. If your cable goes out and you tether with a smartphone in a pinch to get online, your DNS requests...go to the cable company's DNS server, which refuses the requests since it detects an address outside of its known address range (not surprising, since the address sending the requests is a mobile carrier's IP address). The same is true in reverse. If you change your DNS server to match the mobile carrier's DNS servers, when your cable comes back up, requests for address resolution are still going to the mobile carrier's DNS server...and are likewise refused, and for the same reason (the address sending the requests to the mobile carrier's DNS server is coming from a cable company's IP address now).
Using OpenDNS bypasses this problem. The OpenDNS server is a third party DNS server, it is not the cable company's nor the mobile carrier's DNS server. As a consequence, it does not care about who the address of the originating device belongs to. It resolves the IP address either way. So you can switch back and forth between tethered smartphone as modem or your cable or DSL as often as you like without having to go in and change DNS server settings ever. It is not required in our settings in the above example, but it simplifies matters in the long run. In fact, it so simplifies matters, that we will be using OpenDNS to resolve addresses for all of the devices we will be setting up.
- Fill in DNS servers with 208.67.222.222, 208.67.220.220.
Now we will set up the Windows 7 laptop the same way. If you did not have a Linux box handy to get your current settings, in Windows 7, do this:
- Click Start.
- Click Run
- A box pops up with a space into which you can type something. Type the word command. It looks like this:

- In the black window which opens, type ipconfig and press enter.
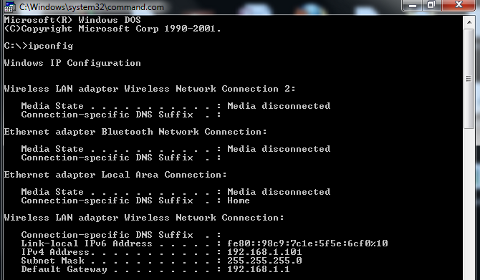
- You get a readout much like this. Write down the
IPv4 address, Subnet Mask and Default Gateway settings
for your Wireless Adapter. If the readout is long,
you can scroll up and down in this window with your
mouse.
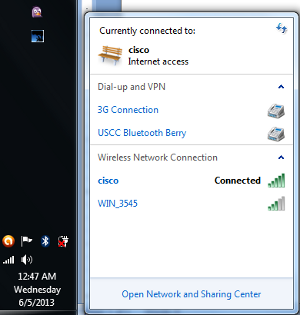
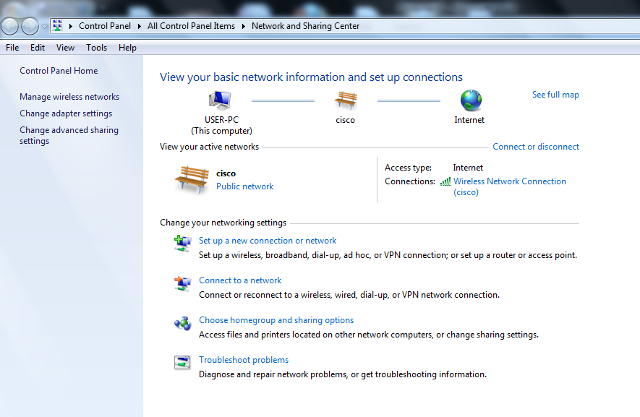
- Click your wireless connection. As with the Linux wireless connection, it looks like a staircase.
- Click Open Network and Sharing Center.
- Click Change Adapter Settings.
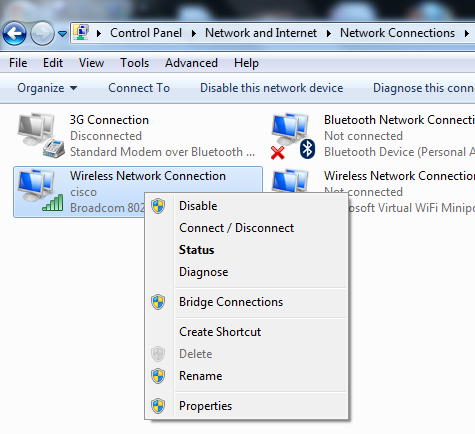
- Left Click once on the connection to edit (in this case, the connection labeled 'cisco' just as with the Linux example).
- Right click and select Properties.
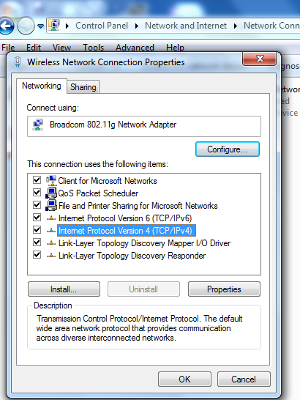
- Click once on Internet Protocol Version 4.
- Click Properties.
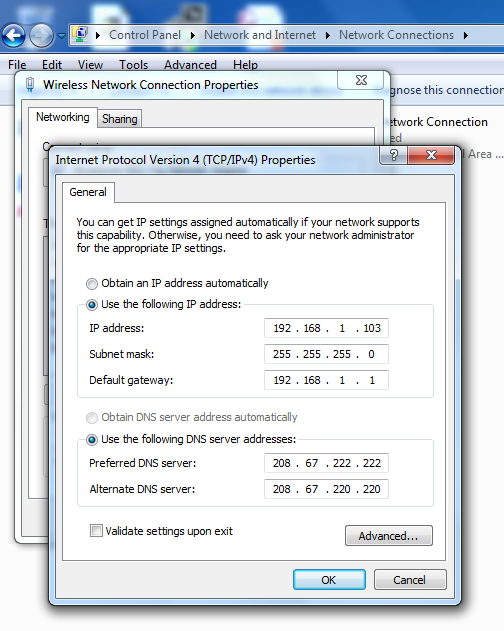
By default, Windows wants to Obtain an IP address automatically. But we know Windows is having trouble doing this reliably. So do the following:
- Select Use the following IP address.
- Fill in IP address, Subnet mask and Default Gateway
from what you wrote down when we set up the Linux
connection (Pop Quiz: you DID write the settings down, I
trust). The only thing which changes in this case is the
IP address. I made this address 192.168.1.103
simply because for me the Windows 7 laptop is third in
terms of importance in my connections to the router, and
this schema serves as a handy note to self.
Neither address is 'better' nor 'worse' than any of the
others in terms of how it receives data from the router.
(NOTE: The purists in the audience will be saying, "But,
Phil, the IP addresses should be numbered 192.168.1.100,
101 and 102, etc." This is because when computers
count, they start with zero, not one. Tip o' the
hat to the purists, they are correct, but I hope that
this way makes it easier to remember the hierarchy in
which devices were added.)
- Select Use the following DNS server addresses and fill in the OpenDNS servers as discussed above.
- Click OK for this box, and OK for the Wireless Network Connection Properties box beneath it.
Last we set up the Android tablet. This was done on major version Eclair, but the underlying concept is the same across versions.
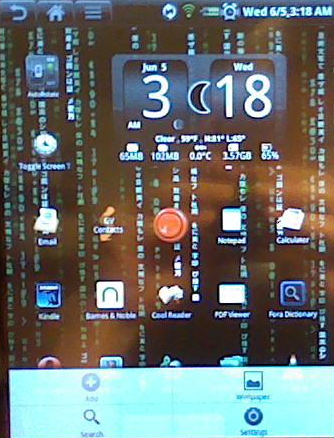
- Press Menu (upper left with the three lines in Eclair).
- Press Settings (lower right in Eclair).
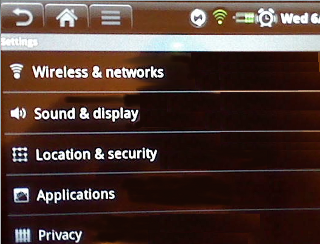
- Press Wireless & networks.
- Press Menu (upper left with the three lines).
- Press Advanced (not shown).
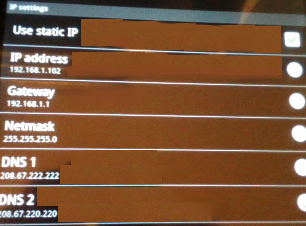
By now this should look pretty familiar. Fill in the values as with the other computers.
- Select Use static IP.
- Fill in an IP address you did not use for the other computers. To me the tablet is more useful than the Windows laptop, but less so than the Linux box, so I used 192.168.1.102 here just as a note to self.
- Fill in the values for Gateway, Netmask and DNS 1 and DNS 2 as you did with Linux and Windows 7.
- You may have to reboot one or all of the computers. I did not, but your results may vary. If you do have to reboot, shut down legitimately, do not just power off.
You're done!
Share this on